

If you've ever worked in pharmaceutical manufacturing, cosmetic production, or any industry that requires precise liquid dosing and sealing, you know how critical a properly calibrated filler capper is. I've spent over a decade supporting clients as a filler capper supplier, and one of the most common questions I hear is, "Why does even a well-maintained machine start off with inconsistent fills or faulty seals after a few months of smooth operation?" Nine times out of ten, the answer is simple: it drifted out of calibration. Calibrating a filler capper isn't just a troubleshooting step-it's the backbone of consistent product quality, regulatory compliance, and avoiding costly waste from overfilled containers or underdosed batches. In this post, I'll walk you through a step-by-step, scientifically grounded process to calibrate your filler capper for accurate filling, share lessons I've learned from hundreds of client installations, and point you to resources that can help optimize your setup.
Before we dive into the calibration process, let's get clear on what calibration actually is for a filler capper. This isn't just adjusting a number on a control screen-it's the process of aligning three core systems that work together to deliver accurate fills and reliable seals: the filling system (which dispenses the exact volume of product), the indexing system (which moves containers into position for filling and capping), and the capping system (which applies the right amount of torque to secure caps without damaging them or creating leaks). If even one of these is off, you'll see issues like overfilled syringes that are hard to package, underdosed liquid that risks regulatory non-compliance, or caps that pop off during transport. For example, I recently worked with a biotech startup that was experiencing a 7% rejection rate on pre-filled syringes because their filler capper was calibrated incorrectly-they were dispensing 0.2mL more product than their specification, which put their batches out of line with FDA guidelines. They fixed the issue by following a structured calibration process, and their rejection rate dropped to less than 0.5% after that.
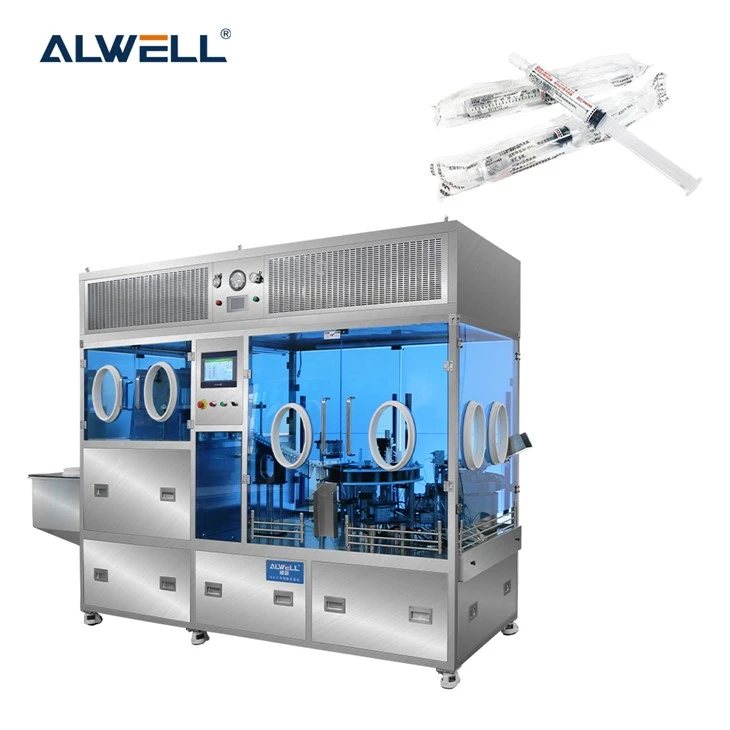
One of the first things I always advise new clients to do is to select the right tooling for their specific product, because calibration starts long before you adjust any settings. If you're filling viscous liquids like gels or thick syrups, for example, a standard nozzle designed for thin water-based products won't dispense volume consistently, even if the machine is perfectly calibrated. That's why our team recommends checking out our pharmaceutical syringe filling machine, which is engineered with adjustable nozzle flow rates and precision piston pumps that make initial calibration far more accurate from the start. It's designed specifically for the tight tolerances required for syringes, vials, and cartridges, so you won't have to compensate for poorly matched tooling mid-calibration.
With the right tooling in place, you can move into the pre-calibration checks that prevent avoidable errors. Skipping these steps is one of the biggest mistakes I see clients make, especially when they're in a rush to get a batch running. Pre-calibration checks should be done every time you switch to a new product, a new container size, or after any maintenance that involves adjusting pump parts, nozzles, or capping heads. The first check is verifying the machine's alignment: run an empty cycle (without product) and make sure the filling nozzle is centered over the container's opening, the indexing system moves containers within 1mm of the target position, and the capping head is perfectly aligned with the cap on the container. Misalignment here will lead to spills during filling or caps that are applied at an angle, even if all other settings are perfect.
Next, check the temperature and viscosity of your product. This is a often overlooked variable that has a huge impact on fill accuracy. Most liquid products-whether pharmaceuticals, oral care liquids, or cosmetic serums-change viscosity with temperature: a liquid that's thin and flows quickly at 25°C will thicken and flow slower at 18°C. If you calibrate your machine when the product is at 25°C, but run a batch when it's at 18°C, the pump will push more volume to compensate for slower flow, leading to overfills. For clients dealing with sensitive temperature-controlled products, like biologic formulations, this is even more critical. I always recommend using inline temperature sensors to maintain a consistent product temperature during calibration and production, or at least recording product temperature during calibration so you can adjust settings if temperature varies in your facility. For multi-product lines that handle different liquid types, our filling capping and labeling machine is designed with modular systems that let you adjust viscosity settings quickly without full re-calibration, saving you time between runs.
Now we're ready for the core calibration steps, starting with the filling system. The most common type of filler capper is a piston filler, which uses a piston moving within a cylinder to draw in and dispense liquid-this is the type our pharma liquid filling machine uses, as it's highly precise for high-volume production. To calibrate a piston filler's volume, follow these steps: First, set up 10 clean, empty containers that match the size you'll be using for production (make sure they're free of residue, as even a small amount of leftover product can affect weight readings). Place them on the machine's conveyor or holding fixture, then program your target fill volume into the machine's control interface. Next, run a test fill of the first 10 containers, then weigh each one individually using a calibrated scale (note: the scale must be calibrated too-always use a traceable scale for pharmaceutical applications, as it's a regulatory requirement). Record the weight of each container, then calculate the average weight, standard deviation, and range between the lightest and heaviest container.
Let's use a real example from a client last quarter: they were filling 10mL syringes with a target volume of 10.0mL. Their initial test run gave them average weights ranging from 9.7mL to 10.3mL, with a standard deviation of 0.2mL. That's a problem-most regulatory bodies require a standard deviation of less than 0.1mL for precision applications. To adjust this, I walked them through adjusting the piston's retraction distance, which controls how much liquid is drawn into the cylinder. They increased the retraction by 0.5mm, ran another test of 10 containers, and this time the average ranged from 9.95mL to 10.05mL, with a standard deviation of 0.04mL-well within specification. For peristaltic fillers, which are often used for delicate products that can't come into contact with metal parts, the calibration process is slightly different: you adjust the motor's rotation speed and tube size instead of piston distance, but the core method of test filling, weighing, and adjusting to hit target volume remains the same.
Once the filling system is calibrated, the next step is calibrating the capping system. A common mistake here is focusing only on torque setting, but capping accuracy depends on three factors: torque, cap alignment, and cap presence. Too little torque, and caps will pop off during shipping or storage; too much torque, and you'll strip the cap's threads or damage the container, leading to leaks or product waste. To calibrate torque, use a torque tester that's traceable to national standards-again, this is critical for regulatory compliance in pharma. Start with a sample cap and container, run a test cap application, then test the torque on the cap with the tester. Adjust the capping head's motor or clutch until the torque reading matches your target (most applications fall between 10 and 50 Ncm, but this varies by cap size and type). For example, small pre-filled syringe caps often require a torque of 15 Ncm, while larger vial caps may need 30 Ncm. I always recommend testing 20-30 caps, not just one, to account for slight variations in cap manufacturing. Also, make sure the capping head is applying the cap at the correct angle-even if torque is set right, a cap applied at an angle will have inconsistent torque readings and may leak. Adjust the head's height and position until the cap sits flush on the container before applying torque.
After calibrating filling and capping, there's one more critical step: integrated calibration testing, where you run a full production cycle (filling, capping, and any downstream processes like labeling) to make sure all systems work together. This is where many clients cut corners, but it's the only way to catch issues that come from system interactions. For example, a filler capper might be perfectly calibrated to fill 10mL, but if the indexing system moves the container into position too quickly, the liquid might slosh out during filling, leading to underfilled containers. Or the capping head might apply torque correctly when a container is stationary, but if the container is moving slightly on the conveyor, it will apply uneven torque. To do integrated testing, run 50 consecutive full cycles, test fill volumes, cap torque, and cap integrity (check for leaks by squeezing or using a pressure test), and make sure no jams or misalignments occur. If you use our filling capping and labeling machine, many of these interactions are pre-tested during our factory acceptance testing (FAT), which reduces the amount of on-site calibration you need to do after installation.
Now, let's talk about maintenance and ongoing calibration, because calibration isn't a one-time task. Even after you get your filler capper perfectly calibrated, it will drift over time due to factors like wear on piston seals, changes in line voltage, or variations in container batches. I recommend a regular calibration schedule to avoid unexpected issues: for high-volume production runs (8+ hours a day), calibrate the filler capper at the start of each shift, or every 4 hours during a long run. For lower-volume runs (1-2 hours a day), calibrate at the start of each run, and after any change in product, container size, or maintenance. Also, keep detailed calibration records-this is not just good practice, it's a regulatory requirement for most industries, including pharmaceuticals. Your records should include calibration dates, test results, adjustments made, and the technician who performed the calibration. I've had clients audited by the FDA or other regulatory bodies, and having clear, accurate calibration records is often the difference between a smooth audit and a costly fine.
Over the years, I've also seen common misconceptions about filler capper calibration that lead to avoidable problems. One myth is that you can skip calibration if you use a new machine-no machine is perfect, and even the highest quality models will need minor adjustments to match your specific product and container specs. Another myth is that calibration only needs to be done if you're having issues-proactive calibration is far cheaper and less disruptive than troubleshooting a batch of rejected product. I had a client a few years ago who waited until they had a 15% rejection rate to calibrate, costing them $20,000 in wasted product and production downtime. If they had done monthly proactive calibration, it would have cost less than $500 in technician time and avoided that loss.
For teams that don't have dedicated calibration technicians, there are resources and tools to make the process simpler. Many filler capper suppliers, including our team, offer on-site calibration training and support, so you can build calibration skills in-house. We also provide detailed operation manuals with step-by-step calibration guides tailored to our specific machines, like our pharmaceutical syringe filling machine which has a simplified calibration wizard for first-time users. For high-volume production, investing in automated calibration systems can also be a game-changer-these systems use sensors and software to adjust the filler capper in real time, reducing human error and cutting calibration time by up to 70%.
If you're preparing to calibrate your filler capper, or if you're looking for a machine that's designed for easy, accurate calibration, our team is here to help. We understand that downtime and inconsistent product can hurt your bottom line and damage your reputation, so we work closely with clients to match them with the right equipment and support their calibration needs. To discuss your specific production requirements, fill accuracy targets, or calibration challenges, please reach out to our team for a consultation. We can walk you through our product lines, including our pharmaceutical syringe filling machine, filling capping and labeling machine for syringe, and pharma liquid filling machine, to help you find the right solution for your operation.

References
- U.S. Food and Drug Administration. (2023). Current Good Manufacturing Practice (CGMP) for Finished Pharmaceuticals. 21 CFR Part 211.
- European Medicines Agency. (2022). Guideline on Good Manufacturing Practice (GMP) Annex 1: Manufacture of Sterile Medicinal Products.
- International Society of Pharmaceutical Engineering (ISPE). (2021). Baseline Guide: Volume 5 – Pharmaceutical Logistics and Distribution.
- PDA Technical Report No. 49. (2019). Calibration of Equipment and Instruments Used in the Pharmaceutical Industry.